Quick Answer
The Glock 17 Gen 5 MOS is one of the most common optic-ready pistols on the market, and the included plate system covers four industry-standard red dot footprints: MRDS, RMR, DPP, and RMSc. Pick the plate that matches your optic's footprint, mount it with a torque driver and thread locker, and confirm zero at 10 and 25 yards.
In This Guide
- Why the MOS system works
- The four standard footprints explained
- Five things that matter in a red dot
- How to mount a red dot on the MOS
- Confirming zero at the range
- Five common install mistakes
- Frequently asked questions
1. Why the MOS system works
The Modular Optic System (MOS) on the Glock 17 Gen 5 is a slide with a precision-milled optic pocket and a set of four adapter plates that cover the most common red dot footprints on the market. The plate system exists so the same slide can host a variety of optics without a custom slide mill. The shooter picks the plate that matches the optic footprint, screws the plate to the slide, and screws the optic to the plate.
The benefit of the MOS over a direct-cut slide is flexibility. Change optics, change plates. Sell an optic and pick up a different one in a different footprint, swap plates instead of buying a new slide. For a buyer who wants to try several optics over the life of the pistol, the MOS is the right platform. For a buyer who already knows exactly which optic they want and will never change it, a direct-cut slide is the stiffer, lower-profile option. Most G17 Gen 5 MOS buyers fall into the first group, which is why the platform has become the default choice for an optic-ready duty or home-defense pistol.
Mounting a red dot on a G17 MOS is not a "screw it on and shoot" job. The plate system is precise, and a stripped screw or a misaligned plate will lose zero or worse. The right way takes 20 minutes with a clean bench and a torque driver.
2. The four standard footprints explained
Footprint jargon is the part that trips up first-time optic buyers. A "footprint" is just the screw pattern and the recoil lug geometry on the bottom of the optic. The four MOS plates cover four of the most common footprints in the market, and most red dot sights fall into one of those four buckets.
| Footprint | Common use | Window size range |
|---|---|---|
| MRDS | Most enclosed red dots, range and duty use | 22–28mm |
| RMR | Enclosed and open red dots, duty and competition | 20–26mm |
| DPP | Enclosed red dots with larger windows | 24–30mm |
| RMSc | Slimline and concealed-carry red dots | 16–20mm |
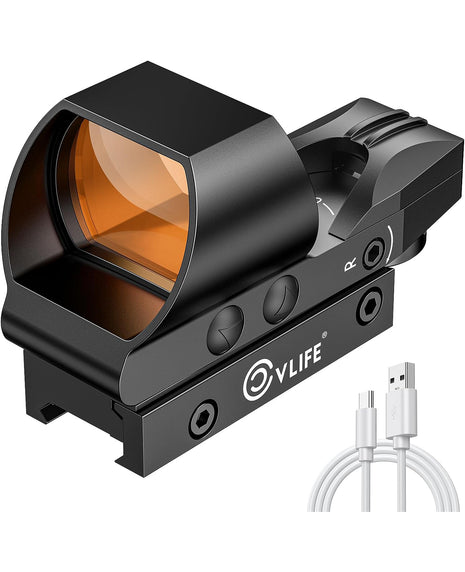
The MRDS footprint is the most common and is shared by the broadest range of optics. If a red dot does not have a specific duty or competition heritage, it is probably an MRDS-footprint optic. The enclosed housing design, which protects the emitter from rain and dust, is most often built in this footprint.
The RMR footprint is shared by enclosed and open-style optics intended for duty and competition use. The slightly wider screw pattern gives a stiffer mount than the MRDS footprint, which matters on hard-kicking calibers.
The DPP footprint is a slightly larger version of the RMR pattern, used by some enclosed optics with bigger windows. The extra width gives a longer sight radius but the same general mount geometry.
The RMSc footprint is the smallest of the four and is shared by optics designed for slimline and concealed-carry slides. The smaller screw pattern keeps the optic light, but the smaller window means the reticle sits further from the shooter's eye, which adds a fraction of a second to target acquisition on a full-size slide.
Before buying a red dot for a G17 MOS, look at the spec sheet for the optic and find the footprint name. Match that to the plate that ships in the MOS kit. If the optic is a footprint that the MOS does not cover, a direct-cut slide is the right answer instead.
3. Five things that matter in a red dot
Five criteria separate a serviceable optic from a frustration. These criteria are the same whether the optic is a budget buy or a high-end model — the only difference is how well each optic meets them.
-
1Recoil rating At minimum 9mm. For shooters who run .40 S&W or .357 SIG through the same Glock frame, the rating should cover those calibers as well. Optics rated only for rimfire will lose zero on the first range session.
-
2Window size 22mm or wider for a full-size slide. Larger windows are easier to find the dot in, especially under stress. Smaller windows are fine for carry pistols but add time to target acquisition on a full-size slide like the G17.
-
3Battery type and life CR2032 batteries are common, cheap, and available at any hardware store. CR1632 batteries are smaller and lighter but harder to find in a pinch. Battery life in the 5,000 to 50,000 hour range is the modern standard. Below 1,000 hours and the optic will need a battery change every shooting season.
-
4Brightness controls Manual brightness buttons are faster to adjust in changing light. Auto-brightness is convenient but can dim the reticle in low light when you need it most. Look for manual controls with at least 8 settings, plus one or two night-vision-compatible low settings.
-
5Enclosed vs. open housing Enclosed housing protects the emitter from rain, dust, and the kind of debris that an open red dot can collect. The trade-off is weight and a slightly taller optic. Open housing is lighter and sits lower, which helps with a clean draw from concealment. For a G17 used as a range or duty gun, enclosed is the safer choice. For a G17 used as a concealed-carry piece, open is the lighter option.
4. How to mount a red dot on the MOS
Mounting is the part most shooters get wrong the first time. The full install takes about 20 minutes with a clean bench and a torque driver. The seven steps below are the same regardless of which optic footprint you choose.
-
Unload and clear the pistol Drop the slide off the frame. Visually and physically confirm the chamber is empty by looking through the chamber with the slide locked back. The pistol must be unloaded before any optic work.
-
Match plate to optic footprint Identify the optic's footprint from the spec sheet. Pick the matching plate from the MOS kit using the footprint code stamped on each plate. Match the code to the spec sheet, not the optic's marketing name.
-
Seat the plate on the slide Place the plate in the optic pocket. The two recoil posts on the bottom of the plate must seat into the matching holes in the slide. The plate should sit flat on the slide with no gap. A plate that does not sit flat will not give a stable zero.
-
Install the plate screws Apply a thin layer of low-strength thread locker to the four plate screws. The screws thread up through the bottom of the slide into the plate. Torque to 9 to 12 inch-pounds per the Glock MOS manual. Do not over-torque; the screws bottom out in the plate.
-
Set the optic on the plate Place the optic on the plate. The optic has matching recoil lugs on the bottom that seat into the plate. The fit should be snug, with no side-to-side play. If the optic shifts, recheck the plate seating and the optic lugs.
-
Install the optic screws Apply thread locker to the optic mounting screws. Torque to 10 to 15 inch-pounds per the optic manual. Cross-tighten the screws in this order: front-right, rear-left, front-left, rear-right. Cross-tightening keeps the optic from drifting as the screws seat.
-
Verify the mount Push the optic with a finger. No side-to-side play. Rack the slide on an empty chamber. The optic does not move. The install is solid. If the optic shifts, the install needs to be redone.
5. Confirming zero at the range
A new mount always needs a zero confirmation. The right process is a 5-shot group at 10 yards on a rest, then adjust the optic to put the group on the point of aim. Most red dots adjust in 1-MOA or 0.5-MOA clicks depending on the model. Click the optic in the direction the group needs to move, fire another 5-shot group, and repeat until the group centers on the point of aim.
After the initial zero, fire a confirmation group at 25 yards. If the group lands where the optic is set, the mount is solid. If the group shifts between the 10-yard zero and the 25-yard confirm, the optic is shifting on the plate, and the install needs to be redone. A shifting optic is almost always a torque issue, a thread locker issue, or a plate seating issue — not an optic issue.
After a confirmation group lands where the optic is set, the optic is zeroed. Confirm the zero again after 200 to 500 rounds, which is the typical break-in for a new mount. If the zero holds, the optic is settled. A confirmation shot once a year is enough to catch any drift from the plate screws or optic screws backing out.
6. Five common install mistakes
Most install problems fall into five categories. Catching them early saves a trip back to the bench.
7. Frequently asked questions
Can I switch red dots without re-zeroing?
No. Every optic has a slightly different point of impact relative to the slide, and every plate seats slightly differently. When you change optics or plates, you confirm zero from scratch. The 5-shot at 10 yards, adjust, 5-shot at 25 yards, confirm process takes about 30 minutes of range time.
What torque do I use on the MOS plate screws?
The Glock MOS manual lists 9 to 12 inch-pounds for the plate screws. The optic manual lists 10 to 15 inch-pounds for the optic mounting screws. Use a torque driver, not a hand driver. Hand-tight is not consistent enough for a serviceable mount.
Will a red dot hold zero on a 9mm G17?
Yes. A correctly mounted, recoil-rated red dot will hold zero past 1,000 rounds of 9mm. Confirm zero again after the first 200 rounds as a break-in check, and once a year after that. A zero that drifts between range sessions is a mounting problem, not an optic problem.
Is the G17 Gen 5 MOS worth it over a non-MOS G17?
For a buyer who plans to mount an optic, the MOS is the right choice. For a buyer who is on the fence about red dots, the MOS is the lower-risk option because the slide still works with iron sights out of the box. A buyer who is committed to iron sights only can save money on a non-MOS slide.
Bottom line
The G17 Gen 5 MOS is a flexible platform for an optic-ready duty, home-defense, or competition pistol. The right red dot for the G17 is the one that fits the plate, matches the use case, and holds zero after 500 rounds. The market has solid options across all four MOS footprints — enclosed for duty and home defense, open for carry, slimline for shooters who want a smaller window on a full-size slide. Mount by the manual, confirm zero at the range, and the G17 is ready.