🎯 Perché “pensavo fosse azzerato” è un’assunzione pericolosa
L’illusione dello zero: perché “sembra allineato” non significa “è azzerato”
Affidarsi solo all’allineamento visivo o a un laser bore sighter è la trappola più comune prima dell’azzeramento. Un bore sighter è uno strumento eccellente per centrare il bersaglio sulla carta, risparmiando tempo e munizioni fornendo un allineamento iniziale approssimativo. Tuttavia, non sostituisce la conferma con colpi reali. Come indicato in varie guide di tiro, il bore sighting fornisce solo un punto di partenza. Il tuo vero Punto di Impatto (POI) è determinato da un complesso intreccio tra la tua arma specifica, le munizioni e la relazione meccanica dell’ottica con la canna—nessuno dei quali un laser può replicare perfettamente.
Variabili del mondo reale: i killer silenziosi dello zero
Anche se il tuo allineamento con il cannocchiale fosse perfetto, questi fattori possono invalidare il tuo azzeramento prima di sparare il primo colpo reale:
- Parallasse: Un concetto cruciale e spesso frainteso. Sebbene molti punti rossi siano pubblicizzati come “senza parallasse”, il vero funzionamento senza parallasse si verifica spesso solo a una distanza specifica (di solito 50-100 yard). A distanze diverse, specialmente molto ravvicinate, se l’occhio non è centrato, il punto può sembrare sul bersaglio mentre la canna è effettivamente puntata altrove. Errore di parallasse misurabile anche in modelli che dichiarano di esserne privi.
- Stabilità del montaggio: Un supporto o una base poco serrati si sposteranno con il rinculo, rendendo impossibile un azzeramento costante. Il montaggio è il collegamento critico tra l’ottica e l’arma.
- Variazioni di munizioni: Pesi, velocità e marche diverse di proiettili avranno punti di impatto differenti. Azzerare con un tipo di caricamento non garantisce lo zero con un altro.
- Errore del tiratore: Posizione, impugnatura, appoggio della guancia o pressione del grilletto incoerenti durante l’azzeramento creeranno un “zero” valido solo se ripeti perfettamente quell’errore ogni volta.
🛠️ Come azzerare correttamente un punto rosso: la guida definitiva passo dopo passo
Questo è il processo che ti permetterà di ottenere un azzeramento solido e affidabile.
Passo 1: Assicurare le basi – Montaggio
Tutto dipende da questo. Assicurati che il tuo punto rosso sia montato su una rotaia pulita e appropriata (ad esempio, Picatinny). Usa un supporto di qualità e una chiave dinamometrica per fissarlo secondo le specifiche del produttore. Un errore comune è stringere troppo poco, causando spostamenti durante il rinculo. Controlla che l'ottica sia livellata. Un mirino a punto rosso installato correttamente è il primo passo imprescindibile.
Passo 2: Scegli la distanza di azzeramento (con intelligenza)
La distanza di azzeramento dovrebbe corrispondere al tuo uso principale. Non esiste una distanza "migliore" universale.
- 25 Yard/Metri: Ottimo per il combattimento ravvicinato, la difesa domestica o carabine calibro pistola. È indulgente e efficiente in termini di munizioni per l’azzeramento iniziale.
- 50 Yard/Metri: Un eccellente azzeramento universale per fucili. Spesso offre una traiettoria relativamente piatta dove puoi mirare al centro del bersaglio da 0 a oltre 200 yard con compensi minimi.
- 100 Yard/Metri: Lo standard per il tiro di precisione, la caccia o dove è fondamentale la precisione a lungo raggio. Richiede più tiro e regolazioni per essere raggiunto.
Consiglio professionale: Per piattaforme AR-15 in 5.56mm, un azzeramento a 50 yard spesso corrisponde a un azzeramento a 200 yard, creando un versatile "azzeramento da battaglia."
Passo 3: Spara il tuo primo gruppo – La verità rivelata
Usa un appoggio stabile—sacche di sabbia, bipiede o slitta da tiro. L’obiettivo è eliminare il più possibile l’errore umano. Alla distanza scelta, mira a un punto di mira piccolo e ben definito. Spara un gruppo da 3 a 5 colpi. Non regolare tra uno sparo e l’altro. Questo gruppo mostra il vero punto d’impatto medio (POI) rispetto al punto di mira (POA).
Passo 4: Regola usando MOA – Il linguaggio della precisione
Qui la conoscenza sostituisce il tentativo. I punti rossi si regolano in Minuti d’Angolo (MOA).
- 1 MOA ≈ 1 pollice a 100 yard. È una misura angolare, quindi si scala: 1 MOA ≈ 0,5 pollici a 50 yard e ≈ 0,25 pollici a 25 yard.
- Conosci il "valore del click" del tuo mirino. I valori comuni sono 1/2 MOA o 1 MOA per click.
-
Calcola: Se il centro del tuo gruppo da 5 colpi è 4 pollici a sinistra e 2 pollici in alto a 50 yard, e il tuo mirino ha click da 1/2 MOA:
➜ Deriva: 4 pollici / 0,5 pollici (per MOA a 50 yd) = correzione di 8 MOA. 8 MOA / (0,5 MOA per click) = 16 click A DESTRA.
➜ Elevazione: 2 pollici / 0,5 pollici = 4 MOA. 4 MOA / (0,5 MOA per click) = 8 click IN GIÙ.
Passo 5: Conferma e affina
Dopo aver effettuato le regolazioni, spara un altro gruppo di 3-5 colpi. Il centro dovrebbe ora essere sul punto di mira o molto vicino. In caso contrario, effettua regolazioni più precise. L’obiettivo è un gruppo stretto e costante centrato dove miri. La pazienza è fondamentale; evita di "inseguire il colpo" regolando troppo dopo ogni sparo.
Passo 6: Verifica il tuo azzeramento (Il passo che la maggior parte delle persone salta)
Un vero azzeramento si verifica in condizioni diverse.
- Controllo secondario della distanza: Se hai azzerato a 25 yard, spara un gruppo a 50 o 100 yard per vedere come funzionano nella pratica i tuoi compensi di tiro.
- Controllo posizione pratica: Spara un gruppo dalle tue posizioni di tiro tipiche—in piedi, inginocchiato, appoggiato. Il tuo azzeramento regge o hai creato un azzeramento "solo da banco"?
- Controllo munizioni: Se usi cariche diverse, annota lo spostamento dell'impatto rispetto alla tua carica di azzeramento.
❌ Errori comuni nell'azzeramento e come evitarli
- Errore 1: Confondere il bore-sighting con l'azzeramento. Soluzione: Conferma sempre con fuoco reale.
- Errore 2: Regolare dopo ogni singolo colpo. Soluzione: Spara gruppi di almeno 3 colpi per trovare il vero punto medio di impatto.
- Errore 3: Usare una piattaforma di tiro instabile. Soluzione: Usa sacche di sabbia, un supporto o un bipiede per isolare la prestazione del fucile dalla tua.
- Errore 4: Ignorare la parallasse a distanza ravvicinata. Soluzione: Per un azzeramento più accurato, fai uno sforzo consapevole per centrare l'occhio dietro l'ottica. Tieni presente che i colpi a distanza estremamente ravvicinata (entro 10-15 yard) possono avere un impatto diverso.
- Errore 5: Non ricontrollare mai l'azzeramento. Soluzione: Controlla periodicamente il tuo azzeramento, specialmente dopo aver trasportato l'arma, cambiato le batterie o subito un impatto significativo.
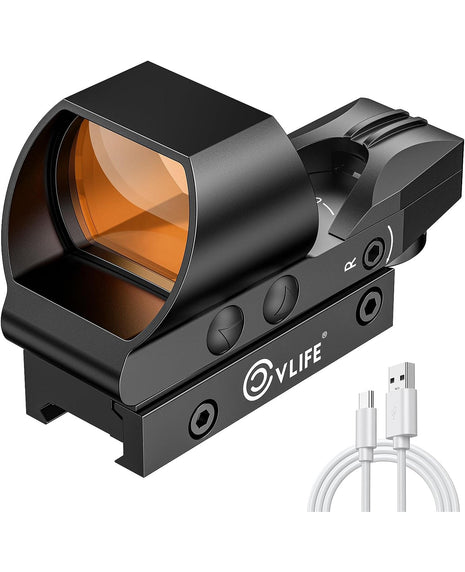
🔭 Mirini Red Dot CVLIFE: Progettati per un azzeramento affidabile
Costruire un azzeramento affidabile inizia con un ottico di fiducia. I mirini red dot CVLIFE sono progettati con le caratteristiche che contano per un azzeramento preciso, durevole e ripetibile.
Mirino Red Dot FoxSpook 2MOA 1x25mm

Ideale per lavori di precisione dove un punto di mira fine è fondamentale. Il punto da 2 MOA consente una precisa collocazione del colpo a distanza, rimanendo veloce da usare da vicino. Dispone di più impostazioni di luminosità per ogni condizione di luce e di una costruzione resistente e impermeabile per mantenere l'azzeramento in ambienti difficili.
Caratteristica principale: Punto ultra-fine da 2 MOA per precisione
Mirino Red Dot con Reticolo Multiplo EagleFeather

Massimizza la versatilità con 4 diversi modelli di reticolo (punto, cerchio, cerchio-punto). Questo mirino è perfetto per il tiro dinamico, la difesa domestica o la caccia, dove potresti aver bisogno di un reticolo diverso per scenari differenti—il tutto mantenendo un azzeramento solido.
Caratteristica principale: Flessibilità multi-reticolo
Offerta a tempo limitato: Usa il codice 35CC al checkout per uno sconto del 35% su tutto il sito. Questa offerta esclusiva termina presto!
❓ Domande frequenti sull'azzeramento del Red Dot
Supporre che un allineamento approssimativo (come con un laser bore sighter) equivalga a un vero azzeramento. Questo salta il passaggio critico della conferma con fuoco reale, che tiene conto del comportamento reale della tua arma, munizioni e ottica. Conferma sempre con gruppi di tiro.
Sì, fino a un certo punto. "Parallax-free" di solito significa che il parallasse è minimizzato a una distanza specifica progettata (ad esempio 50 o 100 yard). A distanze molto ravvicinate (sotto i 15 yard), l’errore di parallasse può essere più evidente. Per un azzeramento più preciso, fai uno sforzo costante per centrare il tuo occhio dietro l’ottica.
È buona pratica controllare il tuo azzeramento:
- Quando installi per la prima volta l’ottica.
- Dopo qualsiasi impatto significativo (caduta dell’arma, rinculo forte da un calibro nuovo).
- Periodicamente, in base all’uso (ad esempio ogni 500-1000 colpi, o all’inizio di una nuova stagione di caccia/tiro).
- Se cambi tipo di munizioni.
Assolutamente. Un azzeramento a 25 yard è molto pratico e può essere fatto al chiuso. Fai attenzione al parallasse a distanze molto brevi (come 10 yard). Per un fucile che intendi usare a distanze maggiori, è altamente consigliato validare successivamente quell’azzeramento a 25 yard a 50 o 100 yard per comprendere la traiettoria del proiettile.
🧰 Strumenti essenziali per un azzeramento senza problemi
- Supporto di tiro stabile: Sacchetti di sabbia, bipiede o slitta di piombo. Fondamentale per eliminare l’errore umano.
- Bersagli Chiari: Usa bersagli con un punto di mira fine e ad alto contrasto e una griglia per misurare facilmente la deviazione del gruppo.
- Cannocchiale da puntamento o binocoli: Per vedere i fori dei colpi senza dover camminare fino al bersaglio ogni volta.
- Strumento di Regolazione: La chiave esagonale, il cacciavite o la moneta della misura corretta per le torrette del tuo ottica.
- (Opzionale) Laser Bore Sighter: Un grande risparmio di tempo per iniziare a centrare il bersaglio.
- Quaderno & Penna: Annota le tue regolazioni, il tipo di munizioni usate e le dimensioni dei gruppi.
✅ Il messaggio chiave: Fidati del processo, non delle supposizioni
Azzerare correttamente un puntatore a punto rosso è un processo sistematico che sostituisce le supposizioni con risultati ripetibili. Richiede pazienza, una piattaforma stabile e la comprensione del MOA. La ricompensa è una fiducia incrollabile nel tuo equipaggiamento. Quando il tuo punto è sul bersaglio, puoi essere certo che anche il tuo colpo lo sarà. Non limitarti a pensare che il tuo punto rosso sia azzerato—sappilo. Investi il tempo in un azzeramento corretto; la tua precisione al poligono, sul campo o in una situazione difensiva dipende da questo.
Pronto a dotarti di un ottica degna di quella fiducia?